

Budget Brilliance: Unlocking Affordable Real Estate Photography Secrets
Why Affordable Real Estate Photography Is a Game-Changer for Listings
Affordable real estate photography doesn’t mean cutting corners — it means getting professional-quality listing images without overspending.
Here’s a quick snapshot of what you need to know:
| What You Want | What’s Possible |
|---|---|
| Budget starter setup | Under $400 in gear |
| Basic professional shoot | Starting around $149 with platforms like Snappr |
| Outsourced photo editing | As low as $0.85 per image |
| AI virtual staging | From $10 per photo |
| Drone add-on | From $50 extra |
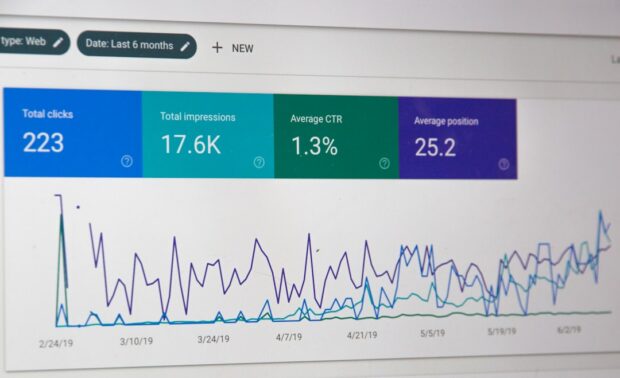
The stakes are high. Homes with professional photos sell 32% faster than those without. Listings with HDR photography get up to 118% more online views. And properties with virtual tours receive 40% more views and 95% more inquiries than photo-only listings.
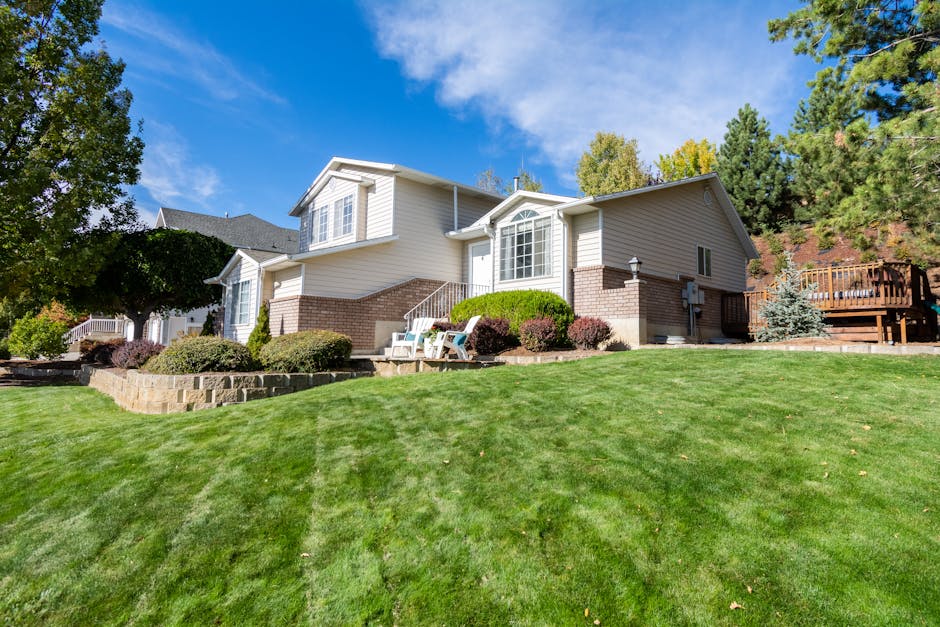
The truth is, first impressions happen online — before a buyer ever steps through the door. A blurry, dark, or poorly framed photo can kill a listing before it even gets a chance.
The good news? You don’t need a $5,000 camera rig to compete. Smart gear choices, the right techniques, and affordable outsourcing have leveled the playing field completely.
As one photographer put it after building a sub-$400 setup and landing their first clients:
“I get great photos — never get any complaints from my realtors.”
I’m digitaljeff — filmmaker, content strategist, and founder of Unsigned Creator Community, with over 20 years in digital media, photography, and brand building across industries where visuals make or break results, including affordable real estate photography. The strategies in this guide are built on real-world experience, not theory, so let’s get into what actually works.

Explore more about affordable real estate photography:
Strategies for Delivering Affordable Real Estate Photography
When we talk about affordable real estate photography, we are looking at a sweet spot where high-quality visuals meet a price point that makes sense for every listing, not just multi-million dollar mansions. In the current market, 100% of homebuyers start their search online. This shift means that the “digital curb appeal” of a property is now the primary driver of physical showings.
Market rates for these services can vary wildly. In major hubs like Los Angeles or New York, a standard shoot might lean toward the higher end of the spectrum, while cities like Dallas, Phoenix, or Atlanta offer more competitive baseline pricing. Typically, the cost is influenced by property size, the photographer’s experience, and the specific deliverables required. For instance, a small 1,500 sq ft condo requires significantly less time and post-processing than a 5,000 sq ft estate.

To stay profitable while offering budget-friendly rates, we have to be efficient. This involves mastering a workflow that minimizes time spent on-site without sacrificing the “wow factor.” Research shows that listings with professional photography sell faster and often for more money because they build immediate buyer confidence. By understanding real estate photography fundamentals, even those on a tight budget can produce results that rival high-end studios.
Essential Gear for Affordable Real Estate Photography
You might think you need the latest full-frame mirrorless camera to get started, but that is a common misconception. Many successful professionals started with APS-C (crop sensor) cameras. A used Sony a5100, for example, is a powerhouse for affordable real estate photography. It’s compact, has a great sensor, and most importantly, supports interchangeable lenses.
The real secret isn’t the camera body—it’s the lens. A wide-angle lens is non-negotiable. For a crop sensor like the a5100, a 12mm prime lens (like the Rokinon 12mm) is perfect for making rooms look spacious without creating “fisheye” distortion.
Stability is your next priority. You don’t need a $500 carbon fiber tripod, but you do need something that won’t shake when the shutter clicks. A sturdy used tripod paired with a budget-friendly head leveler ensures your horizons are straight—a hallmark of professional work.
| Equipment Item | Budget Option (Used/Entry) | Estimated Cost |
|---|---|---|
| Camera Body | Sony a5100 / Canon EOS M50 | $200 – $250 |
| Wide-Angle Lens | Rokinon 12mm f/2.0 | $100 – $150 |
| Tripod | Used Sunpak or AmazonBasics | $15 – $30 |
| Leveling Base | Neewer Tripod Leveler | $30 |
| Total Setup | The “Pro-Starter” Rig | ~$345 – $460 |
We also recommend leveraging technology to bypass hardware limitations. Many entry-level cameras have limited “bracketing” capabilities (the ability to take multiple shots at different exposures). By using smartphone apps that connect to your camera via Wi-Fi, you can trigger advanced bracketing sequences that the camera’s native software might not allow. This is a massive “cheat code” for getting high-end HDR results on a shoestring budget. For a deeper dive into what you need, check out our guide on camera equipment for real estate photography.
Maximizing Results with Affordable Real Estate Photography Techniques
Great gear is useless without the right technique. The most important skill to master for affordable real estate photography is High Dynamic Range (HDR) bracketing. This involves taking 3 to 5 photos of the same scene at different exposure levels—one for the bright windows, one for the dark corners, and one for the mid-tones. Later, these are merged to create a single image where everything is perfectly lit.
Vertical alignment is another “make or break” factor. If the walls in your photos look like they are leaning inward or outward, the photo will look amateur. Always shoot at “chest height” and keep your camera perfectly level.
Lighting is your best friend and your worst enemy. While we love natural light, it can be tricky. We often suggest shooting during the “Golden Hour” or using a technique called “Flambient” (a mix of flash and ambient light) if you want to level up. However, for a truly affordable approach, clean natural light with proper bracketing usually does the trick.
Don’t forget the “small” details that ruin big shots:
- Toilet seats: Always, always put them down.
- Clutter: Clear off kitchen counters and remove trash cans.
- Lighting: Turn off ceiling fans (they blur in long exposures) but turn on all lamps to create a warm atmosphere.
To ensure you never miss a step, we highly recommend you DOWNLOAD the pre-shoot checklist to share with your clients before you arrive. If you are just starting out, our beginner camera gear and best camera for beginners resources can help you navigate your first purchases.
Selecting the Right Pricing Models and Add-ons
As a provider or a seeker of affordable real estate photography, understanding how pricing works is vital. Most professionals use one of three models:
- Square Footage: Pricing scales with the size of the home (e.g., up to 2,000 sq ft, 2,000-3,000 sq ft). This is the most common and transparent model.
- Per Photo: Charging for a set number of images (e.g., 25 photos for a flat fee).
- Hourly: Less common for standard listings but used for high-end architectural work.
To maximize value, look for “bundled” services. Adding a drone session or a 3D tour can often be done for a fraction of the cost when booked alongside standard stills. Drone photography, in particular, is a high-value add-on. It helps homes sell 68% faster by showing the property’s context within the neighborhood. If you’re curious about the best tech for this, read about the dji mavic air 2 real estate photography capabilities.
Virtual tours and floor plans have also become “must-haves.” A 2D or 3D floor plan helps buyers visualize the layout, increasing interest by up to 55%. Services like Asteroom or Matterport offer various tiers, from DIY smartphone captures to professional-grade scans, making it easy to find a budget-friendly entry point. You can learn more about capturing these unique angles in our article on drone pictures of houses.
Streamlining Post-Processing with Outsourced Editing
Post-processing is where the magic happens, but it is also the most time-consuming part of the job. For a freelance photographer, spending four hours editing a $150 shoot kills profitability. The solution? Outsourcing.
Many professionals send their bracketed files to overseas editors. This is a game-changer for affordable real estate photography. For as little as $0.85 to $1.50 per image, expert editors can handle the HDR merging, window masking, and vertical straightening overnight. You wake up to finished, MLS-ready photos.
Beyond standard editing, consider these high-value AI services:
- AI Virtual Staging: Empty rooms feel cold. Virtual staging adds hyper-realistic furniture for about $10-$35 per photo, far cheaper than renting real furniture.
- Virtual Twilight: Don’t want to wait for sunset? Editors can turn a midday exterior shot into a glowing “Golden Hour” masterpiece using AI.
- Clutter Removal: If the homeowners didn’t clean up, AI can digitally remove that unsightly trash can or messy pile of mail.
Mastering these workflows is the key to scaling. For those who want to learn the “gold standard” of combining flash and natural light, check out our guide on how to shoot flambient real estate photography.
Vetting and Hiring Budget-Friendly Professionals
If you are a realtor looking to hire, you don’t have to sacrifice quality for a low price. The rise of photography marketplaces has made finding local real estate photographers easier than ever.
When vetting a budget-friendly photographer, look for:
- A Specialized Portfolio: Do they have actual real estate shots, or just wedding photos? Real estate requires specific wide-angle skills.
- Turnaround Time: In real estate, time is money. Most affordable pros offer 24-48 hour delivery.
- Volume Discounts: If you have multiple listings, ask for a package deal.
- Communication: A photographer who responds quickly and offers a clear prep guide is usually more professional, regardless of their price.
Even “cheap” photography can be high-quality if the photographer understands the fundamentals of composition and lighting. It’s about finding someone who knows how to make a room look “big and bright”—the two things every buyer wants to see.
Conclusion: Maximizing ROI with CheatCodesLab
Unlocking the secrets of affordable real estate photography is about working smarter, not harder. Whether you are a photographer building a business with a used Sony a5100 or a realtor looking for the best bang for your buck, the tools and techniques are more accessible than ever before.
By combining budget-conscious gear choices with powerful outsourcing and AI-driven add-ons like virtual staging, you can create listings that stand out in a crowded market. Professional visuals aren’t just an expense; they are a proven investment that increases sales speed and final offer prices.
At CheatCodesLab, we specialize in providing the “cheat codes” for modern marketing. From AI-driven SEO tools to comprehensive guides for online creators, we ensure you have the top-tier solutions needed to win. Don’t let a limited budget stop you from achieving professional results.
Ready to gear up? Dive into our exhaustive list of the camera equipment for real estate photography to find the perfect balance of price and performance. For more on building your professional image, check out our tips on branding for real estate agents and personal branding for real estate agents.


About the author


How to Archive Posts on Instagram in 4 Easy Steps
Master archiving on Instagram in 4 easy steps to organize your profile and protect your content.

Beginner’s Guide to 10k free instagram followers app
Discover how a 10k free instagram followers app works, its risks, and safe organic growth strategies for real engagement in 2026.

Beginner’s Guide to Best Instagram Report App
Discover the best Instagram report app for real-time analytics, automated reports, and data-driven decisions in 2026.
How to Master Advanced SEO Search Techniques in 7 Steps
Master advanced search techniques in SEO with 7 proven steps to boost rankings, technical audits, and organic traffic.
Cheat Sheet to the Best Business Apps
Discover the best business apps to streamline operations, boost productivity, and scale your business in 2026.

How to Get Instagram Followers Free APK in 5 Steps
Discover how instagram followers free apk 2026 download works and learn safe organic growth strategies instead of risky third-party tools.
Related
How to Archive Posts on Instagram in 4 Easy Steps
Master archiving on Instagram in 4 easy steps to organize your profile and protect your content.

Beginner’s Guide to Best Search Engine Optimization SEO
Master best search engine optimization SEO with this beginner's guide covering on-page, technical, and AI strategies for higher rankings.

Ultimate Checklist for Social Media Marketing Agency
Discover the ultimate checklist for choosing a social media marketing agency that drives real ROI and growth.

Hot Summer Caption Ideas That Spark Engagement
Discover hot summer caption ideas that boost engagement, from short aesthetic lines to funny unhinged vibes and beach photo dumps.

How to Add Text to Instagram Story in 5 Easy Steps
Learn how to add text to Instagram Story in 5 easy steps with our native tips and creative text hacks for better engagement.

How to Add Audio to Instagram Story the Right Way
Learn how to add audio clip in Instagram Story using built-in music or your own file with this step-by-step guide.