



How to Add Audio to Instagram Story the Right Way
Why Audio Makes or Breaks Your Instagram Story
Knowing how to add audio clip in Instagram Story is one of the fastest ways to make your content stand out — and it’s simpler than most people think.
Here’s the quick answer:
- Open Instagram and swipe right to open the Story camera
- Record or upload your photo or video
- Tap the sticker icon at the top of the screen
- Select Music
- Search for a track, pick your snippet (5–15 seconds), and choose a display style
- Tap Your Story to publish
Want to use your own audio file? Instagram doesn’t support direct MP3 uploads. You’ll need to embed your audio into a video file first using an app like CapCut or InShot, then upload that video to your Story.
Audio isn’t just a nice touch — it’s a retention tool. Over 500 million people watch Instagram Stories every day, yet only 1–8% of your followers actually tune in on any given day. The right sound in the first second or two can be the difference between a swipe-away and a full watch.
And it’s not just personal creators who care. 71.9% of brand content now appears in Stories, which means the competition for attention is real. Music and audio give your Story an emotional hook before a single word is read.
There are two main ways to add audio to a Story:
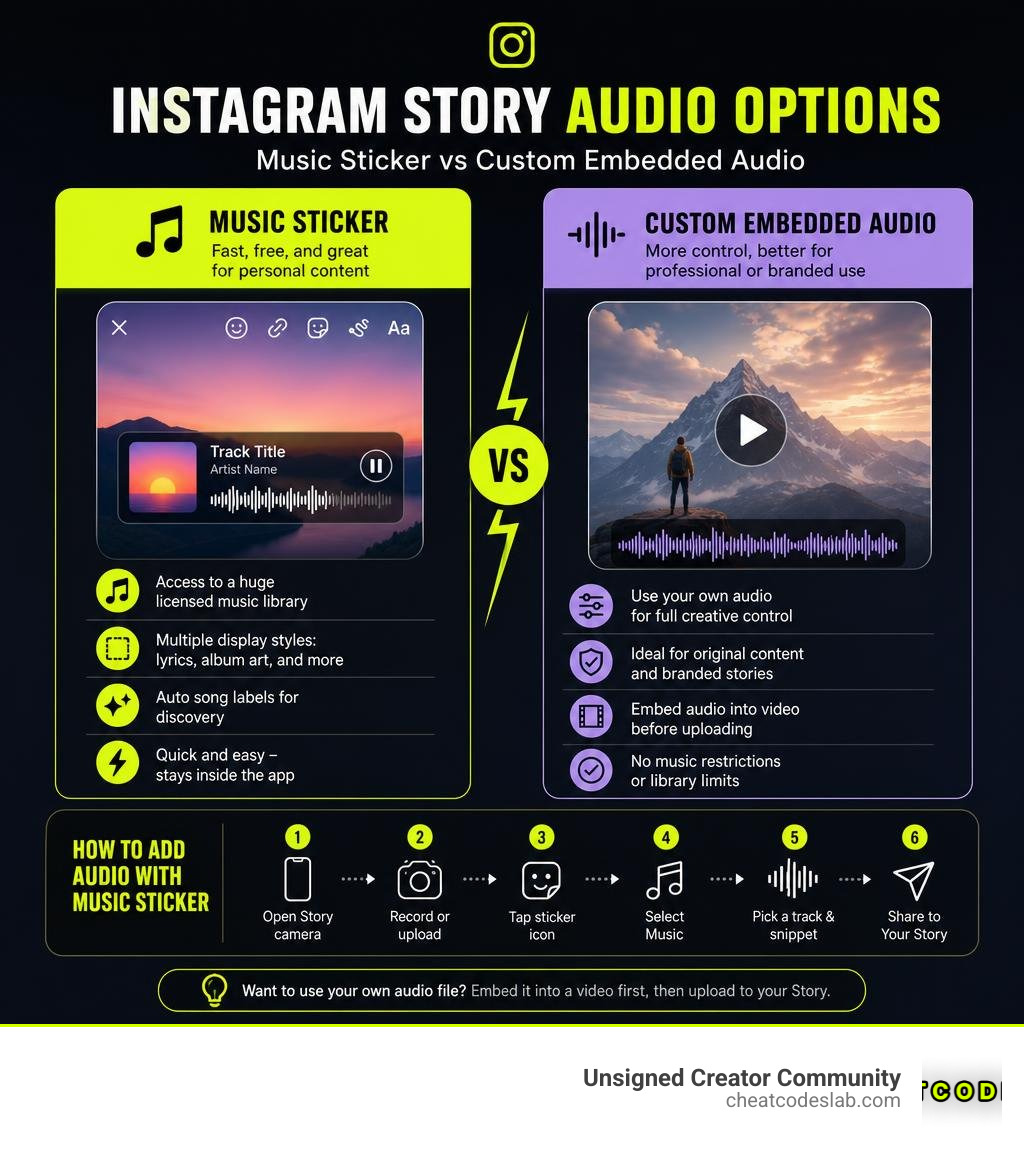
- Instagram’s built-in Music sticker — fast, free, and great for personal content
- Custom audio embedded in a video — more control, better for professional or branded use
Both methods have different rules, limits, and best practices — which is exactly what this guide covers.
I’m digitaljeff — content strategist, filmmaker, and founder of the Unsigned Creator Community — and over the past 20 years I’ve helped top personal brands master exactly this kind of creator workflow, including how to add audio clips in Instagram Stories that actually keep people watching. Let’s get into everything you need to know, step by step.
How to Add Audio Clip in Instagram Story Using Instagram’s Built-In Music Sticker
The easiest way to inject life into your daily slides is by using Instagram’s built-in Music sticker. When you use this native tool, Instagram pulls from its massive, officially licensed music library. This library is updated constantly in June 2026 to include the latest viral hits and trending tracks.
Using the native sticker keeps your workflow entirely inside the app. It also gives you access to interactive features like live scrolling lyrics, customizable album art displays, and automated song labels that let your viewers tap to discover the track for themselves.
If you are looking to master this native workflow quickly, you can also check out our quick guide on how to Add Audio to Instagram Story to get a head start.
Step-by-Step: How to Add Audio Clip in Instagram Story With the Music Sticker
Ready to drop some beats? Here is the exact step-by-step process to add a music track to your Story:
- Open Instagram and swipe right from your feed to open the Story composer.
- Capture or upload your media. You can take a fresh photo/video or swipe up to select one from your camera roll.
- Tap the Sticker icon (the square smiley face) at the top of the screen.
- Choose the Music sticker. This will open the native audio library.
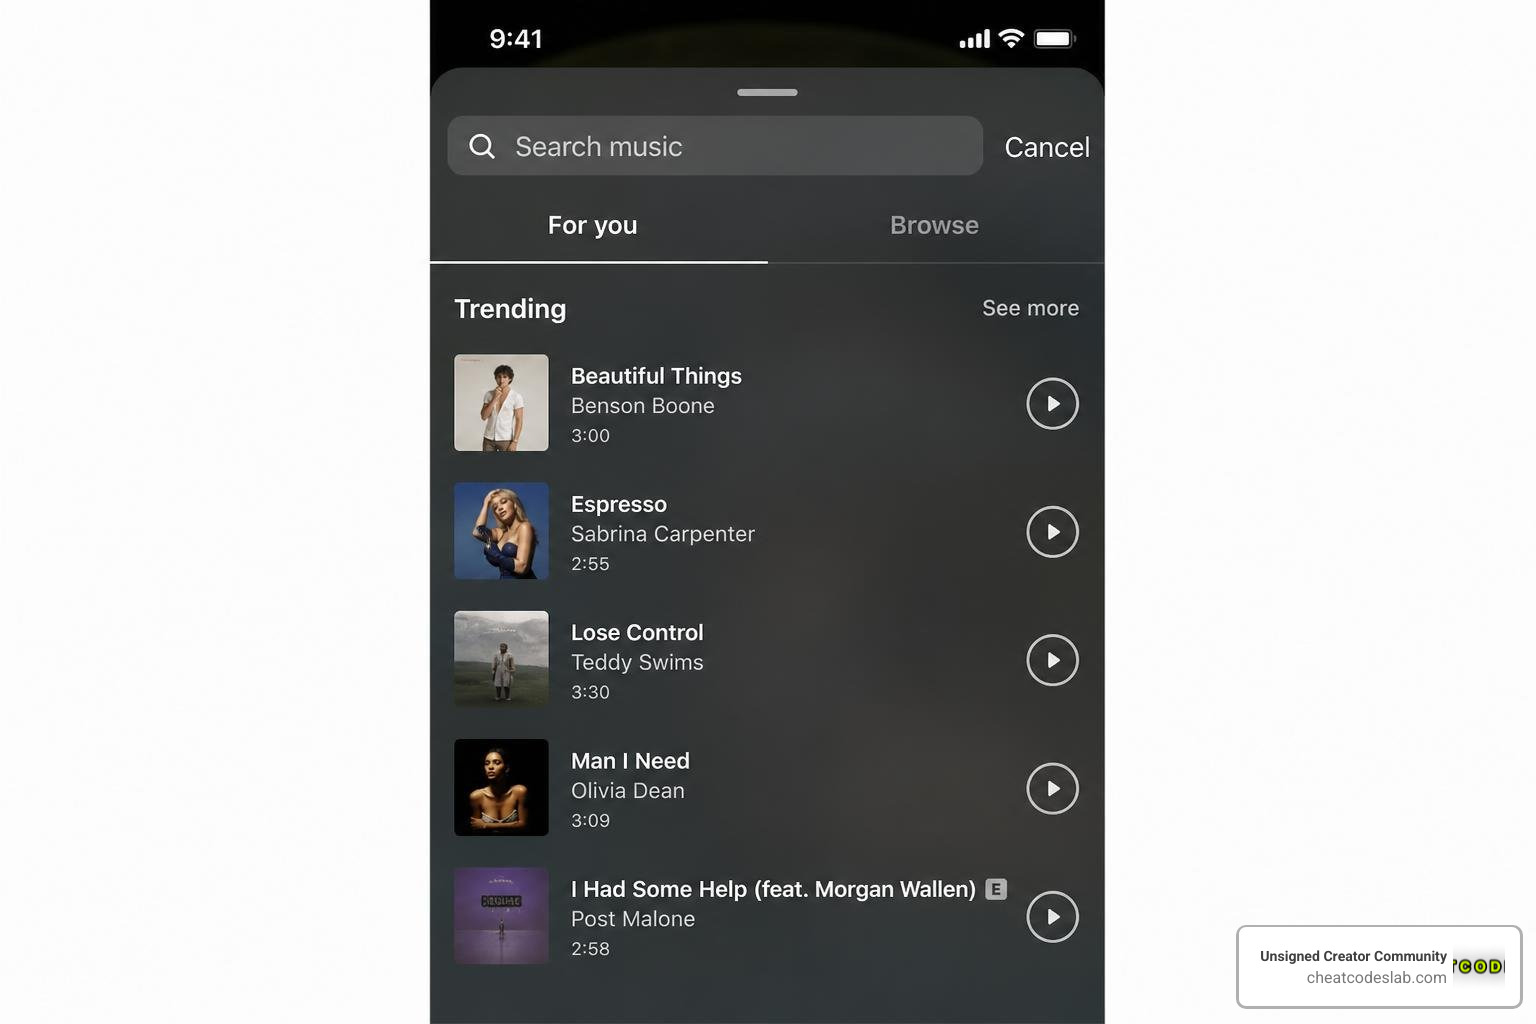
- Search for your track. You can browse the “For You” tab, search by specific song or artist name, or explore different genres. Tap the play button next to any track to preview it.
- Pick your snippet. Once you select a song, a waveform slider will appear. Drag it left or right to find the perfect section of the song (like the hook or a dramatic beat drop).
- Set your duration. Stories allow you to set the music clip length anywhere between 5 and 15 seconds.
- Choose your visual style. Tap the icons above the slider to cycle through different lyrics styles, display the album art, or use a minimal song label.
- Place and size the sticker. Tap Done. Use a pinch gesture with two fingers to shrink, enlarge, or rotate the sticker. You can even drag it off the edge of the screen if you want a clean-screen look while the music still plays!
- Publish! Tap Your Story to share it with your audience.
Pro-tip: When placing lyrics or stickers, make sure to keep them within the “safe zones” (away from the very top and bottom margins) so they don’t get covered by your profile icon or the viewer’s reply bar.
Music Sticker Limits, Account Restrictions, and Commercial Use Rules
While the Music sticker is incredibly convenient, it does come with a few notable limitations that creators and brands must navigate:
- The 15-Second Clip Limit: Even though Instagram supports longer video Stories (up to 60 seconds without chopping), the native music sticker is strictly capped at a maximum of 15 seconds per slide.
- The “Business Account Trap”: If you operate a professional Business profile, you will notice your music library is restricted to the Meta Sound Collection (royalty-free instrumental and commercial tracks). Popular commercial music is unavailable due to copyright laws. If you want access to mainstream music, switching to a Creator Account is a common workaround.
- Muted Saved Stories: If you design a Story with a native music sticker and try to save the video to your phone’s camera roll, Instagram will strip the audio away to prevent copyright infringement. Your saved file will be completely silent.
To help you decide which path to take, we have broken down the differences between the native library and custom embedded audio:
| Feature | Built-In Music Sticker | Custom Embedded Audio |
|---|---|---|
| Source | Instagram Licensed Library | Your own files (MP3, WAV, etc.) |
| Max Clip Length | 15 seconds | Up to 60 seconds (full Story length) |
| Business Accounts | Very restricted | Fully allowed (if you own the rights) |
| Save with Audio | No (audio is stripped on download) | Yes (audio remains in the video file) |
| Lyrics Display | Yes (automatic) | No (must add manually) |
If you are a business owner or a creator working on a sponsored campaign, using the native sticker with popular music risks getting your content flagged, muted, or taken down. For commercial campaigns, embedding licensed tracks directly into your video before uploading is always the safest option. For more details on these legal nuances, you can read How To Add Music to Instagram Posts & Stories | Later .
How to Add Music Across Multiple Photos or Story Slides
Have you ever tried to post a sequence of three photos in your Stories, only to have the music restart from the beginning on every single slide? It ruins the flow and annoys your viewers.
Because Instagram treats each Story slide as an individual post, there is no native way to make a single Music sticker play continuously across multiple photos. However, there is a brilliant workaround.
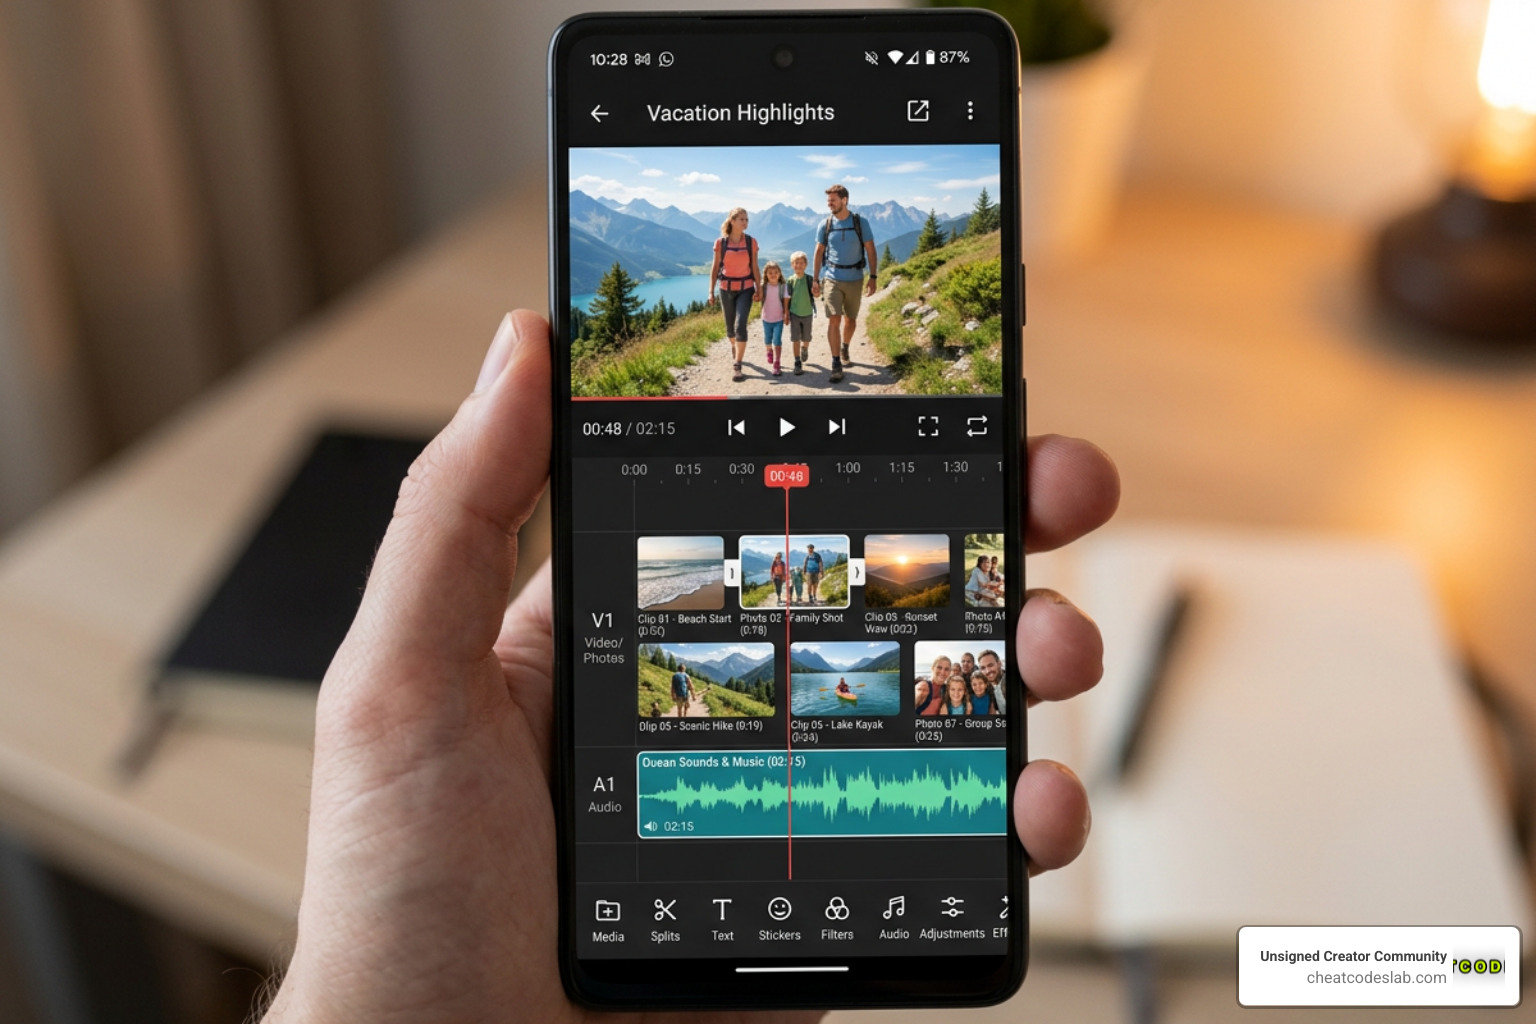
Instead of uploading individual photos, use a mobile editing app (like CapCut, InShot, or Canva) to combine your photos into a single slideshow video. Add your continuous audio track across the entire timeline, export it as a vertical 1080×1920 video, and upload it as a single video clip. Instagram will automatically split the video into seamless 15-second slides, but the audio will play continuously without a single interruption.
How to Upload and Use Your Own Audio File in an Instagram Story
Sometimes, the track you want simply isn’t in Instagram’s library. Whether you want to share an original song you recorded, add a custom voiceover, or use a specific sound effect, you will need to upload your own audio.
As we mentioned earlier, Instagram does not allow you to directly upload raw MP3 or WAV files into the Story composer. To get around this, you must package your audio inside a video container. If you want to dive deep into this strategy, check out our comprehensive guide, Tune In: The Ultimate Guide to Adding Music to Your Instagram Story.
How to Add Audio Clip in Instagram Story When It’s Your Own File
To add your own audio file to your Story, you will need to merge your sound file with a visual element using an external editor before uploading. Here is how to do it:
- Prepare your audio file: Make sure your custom voiceover, track, or sound effect is saved on your phone or computer in MP3 or WAV format.
- Open a video editor: Import a static image, a video clip, or even a simple colored background into a mobile editor like InShot or CapCut. Ensure the project aspect ratio is set to 9:16 (1080×1920 pixels).
- Import your audio: Add your custom audio file to the timeline.
- Trim and align: Cut the video background to match the exact length of your audio clip. Keep it under 60 seconds to ensure it fits perfectly within Instagram’s Story limits.
- Mute original sounds: If your background video has ambient noise, remember to mute the original video track so it doesn’t clash with your custom audio.
- Export and Upload: Export the project as an MP4 video. Open Instagram, swipe to your Story camera, select your newly created video from your camera roll, and post it.
For an alternative look at this process, you can read How to Add Original Audio to Instagram Story? – TinyGrab or explore more custom methods on How to Add Own Audio to Instagram Story .
Best Practices for Choosing, Editing, and Displaying Story Audio
Getting the technical steps down is only half the battle. To make sure your audio actually converts casual viewers into highly engaged followers, keep these professional best practices in mind:
- The 2-Second Hook: Viewers decide whether to skip your Story in the first two seconds. Make sure your audio has an immediate hook—whether that’s a punchy voiceover line or a recognizable beat drop.
- Watch Your Levels: Don’t let your music drown out your voice. If you are speaking, lower the background music volume to around 10-15% of its original level.
- Avoid Compression Distortion: Instagram compresses audio heavily. To prevent your custom tracks from sounding muddy or distorted, normalize your audio levels and keep your peaks below clipping.
- Design for “Sound-Off” Viewers: A significant portion of users watch Stories on mute. Always add captions or text overlays to explain what is happening in the audio.
- Keep a License Folder: If you use royalty-free tracks for business content, keep a dedicated folder on your cloud storage containing your license certificates and invoices. If your video is ever flagged by Instagram’s automated copyright systems, you can quickly submit your proof of permission.
To learn more about optimizing your video content for the algorithm, take a look at our guide on Best Practices Instagram Reels.
Tools and Workflows for Custom Audio, Lyrics, and Music Information
If you want to build a highly efficient content creation system, using the right tools makes all the difference.
For quick edits on your phone, CapCut and InShot are the gold standards. They allow you to easily split audio, reduce background noise, and add automated subtitles with a single tap. For desktop editing, Adobe Premiere Rush or CapCut Desktop offer advanced timeline controls that make syncing audio transitions to visual cuts incredibly easy.
If you want your original music to appear directly inside Instagram’s native search library so other creators can find and use it, you should use a digital music distributor like DistroKid or TuneCore. When submitting your tracks, make sure to select Facebook/Instagram as a distribution destination.
For more tips on leveraging platform tools, explore our resource on Instagram Features.
Troubleshooting Instagram Story Audio and Publishing With Fewer Surprises
Even experienced creators run into technical glitches. If you are struggling with missing features or silent audio, here is a quick troubleshooting checklist to get you back on track:
- Can’t find the Music sticker? This is usually caused by an outdated app, regional licensing restrictions, or a VPN. Try turning off your VPN, updating your app in the App Store, or logging out and back into your account.
- Is your Story completely muted? Double-check that your phone’s physical ring/silent switch isn’t set to silent. On some devices, Instagram defaults to playing Stories muted if your phone is set to vibrate.
- Did your song suddenly disappear? Licensing agreements between Meta and record labels change constantly. If a saved song disappears from your sticker search, it has likely been removed from the platform’s database. Your best bet is to use the custom video embedding method instead.
At Unsigned Creator Community, we want to make sure your creative workflow is as seamless as possible. If you want to skip the trial-and-error altogether, we highly recommend checking out the certified AI marketing tools and strategies over at CheatCodesLab to optimize your entire content creation process.
Ready to take your audio strategy to the next level? Head over to our main hub to learn more about how to Add Audio to Instagram Story and start creating scroll-stopping content today!


About the author


How to Archive Posts on Instagram in 4 Easy Steps
Master archiving on Instagram in 4 easy steps to organize your profile and protect your content.

Beginner’s Guide to 10k free instagram followers app
Discover how a 10k free instagram followers app works, its risks, and safe organic growth strategies for real engagement in 2026.
Beginner’s Guide to Best Instagram Report App
Discover the best Instagram report app for real-time analytics, automated reports, and data-driven decisions in 2026.
How to Master Advanced SEO Search Techniques in 7 Steps
Master advanced search techniques in SEO with 7 proven steps to boost rankings, technical audits, and organic traffic.

Cheat Sheet to the Best Business Apps
Discover the best business apps to streamline operations, boost productivity, and scale your business in 2026.

How to Get Instagram Followers Free APK in 5 Steps
Discover how instagram followers free apk 2026 download works and learn safe organic growth strategies instead of risky third-party tools.
Related
How to Archive Posts on Instagram in 4 Easy Steps
Master archiving on Instagram in 4 easy steps to organize your profile and protect your content.

Beginner’s Guide to Best Search Engine Optimization SEO
Master best search engine optimization SEO with this beginner's guide covering on-page, technical, and AI strategies for higher rankings.

Ultimate Checklist for Social Media Marketing Agency
Discover the ultimate checklist for choosing a social media marketing agency that drives real ROI and growth.

Hot Summer Caption Ideas That Spark Engagement
Discover hot summer caption ideas that boost engagement, from short aesthetic lines to funny unhinged vibes and beach photo dumps.

How to Add Text to Instagram Story in 5 Easy Steps
Learn how to add text to Instagram Story in 5 easy steps with our native tips and creative text hacks for better engagement.

How to Configure Instagram Advanced Settings in Minutes
Configure advanced setting Instagram options in minutes to boost privacy, media quality, and engagement for your 2026 content strategy.